


When you’re up against a gifting deadline like Christmas Day or a child’s birthday party, it’s easy to become anxious about putting their dream toy together safely and correctly. Now it’s time to put those worries aside! For those little mishaps like a screw that won’t go in or trying to figure out how to put a cap nut together, we’ve organized some of our top pro tips for Step2 products for a safe and smooth assembly experience.
Pro Tips
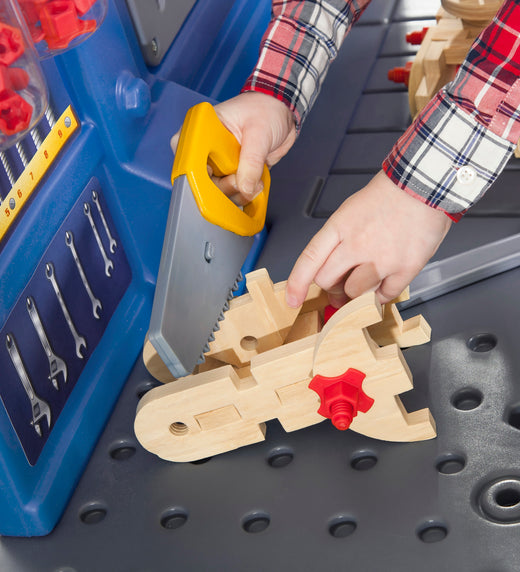
- Fitting Parts Together
Our parts fit tightly together for added strength and durability. If you have trouble getting a secure fit, use a drop or brush on vegetable oil or dish soap to help them along!
- How To: Cap Nut Assembly
Cap nuts are tough little guys. Make sure the whole piece is completely straight when assembling with cap nuts. This is where help from a friend can go a long way!
- Buddy System
Ask a friend for help, especially on items with a longer assembly time and long or awkward pieces that need aligned.
- Note Left, Right, Front & Back
When reviewing the included parts, be sure to pay attention to the Left and Right pieces. Set yourself for success with making sure critical parts like wheels and doors are installed on the correct side!
- Screw Sizing
The product’s included screws are actual size to the assembly sheet. Match them up before you begin to ensure the correct screw sizes for each step.
Screw FAQ
Q: Why don’t Step2 products include pre-drilled holes?
A: Think about hanging a picture on a wall in your home. If you put a new nail into an existing hole, it wouldn’t have a strong hold. It’s better for you to create the holes yourself, so that every item is guaranteed complete alignment for the best and strongest results.
Q: What’s the best way to get the screws into the pieces properly?
A: First, it’s important to pay attention to the screw sizes. All screws are actual size on the assembly instructions, so match the screws up to guarantee you’re using the correct size for each step.
Second, starting with the correct size screwdriver is key. Save time up front by taking note of the screwdriver type and head size to avoid wiggly screws during assembly.

And third, create a straight line of pressure. Align the screw top with the screwdriver, up to your hand and elbow position. Put direct pressure onto the screw by turning slowly with the line of pressure until the screw starts to tighten into the plastic. Do not overtighten the screws!
Looking for assembly time and tips? Read our informative blog post HERE.
Download the full DIY Assembly Worksheet HERE.